2026 Top Smart Locks How to Install a Smart Lock on a Standard Door?

Time:2026-10-19 Author:Amelia
0%

Smart locks are moving from premium upgrades to practical home-security tools. Parks Associates reported that connected-home adoption continues to expand among U.S. broadband households, with security devices remaining a leading category. Its consumer research also shows that convenience and remote access strongly influence smart-device purchases. A lock that opens with a phone, keypad, or fingerprint can make daily entry easier, especially when hands are full.

Yet convenience should not replace careful installation. The 2025 Grand View Research smart lock market analysis identifies rising smartphone use, connected-home ecosystems, and improved wireless technology as major growth drivers. These trends explain why more homeowners are asking, “How to install a smart lock on a standard door?” The answer depends on the existing deadbolt, door thickness, backset, strike plate, and available interior clearance. A small mismatch can cause rubbing, failed calibration, or an unreliable latch.

This guide focuses on a realistic installation process for a typical residential door. You will see how to check compatibility, remove the old hardware, align the mounting plate, install batteries, and test manual operation before connecting an app. Measure twice. It saves frustration. Manufacturer instructions still take priority, because smart-lock designs vary more than product photos suggest. I have also included practical checks that are easy to overlook, such as testing the lock with the door open and confirming that the emergency key works. No installation is perfect on the first attempt. Careful testing makes the difference between a clever upgrade and a daily nuisance.
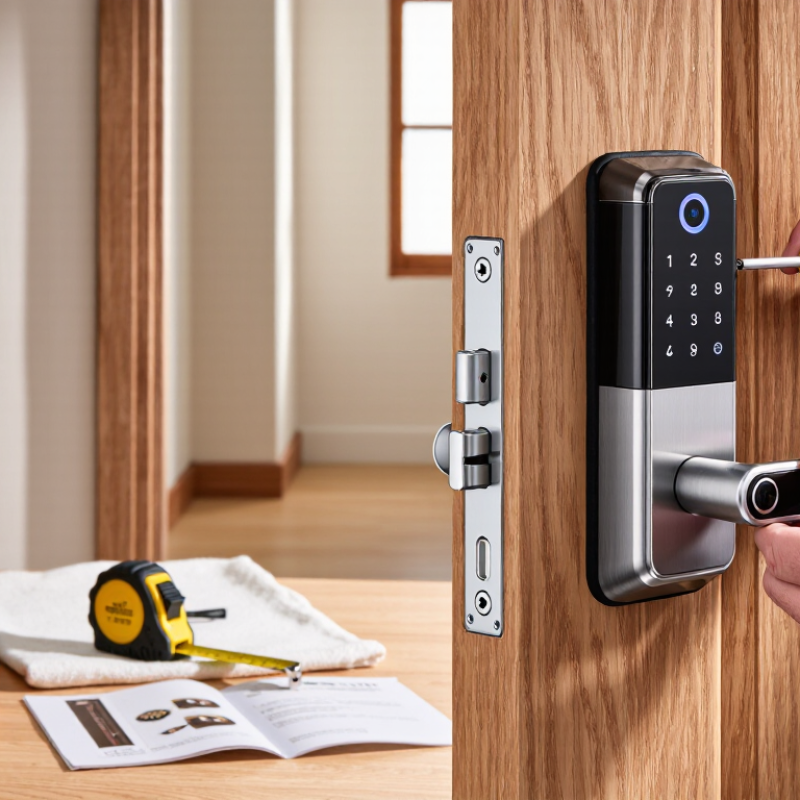
2026 Top Smart Locks How to Install a Smart Lock on a Standard Door?

Smart Lock Types and Compatibility with Standard Doors

A standard door usually has a cylindrical deadbolt, a round bore, and a common backset. This makes replacement-style smart locks the easiest option. They remove the existing deadbolt and use the same opening. Measure the backset, door thickness, bore diameter, and edge clearance before ordering. Small differences can stop the interior motor from sitting correctly.

Retrofit smart locks are another practical choice. They attach over the inside thumb-turn and leave the outside keyhole unchanged. This helps renters or homeowners who want fewer door alterations. Keypad models add code entry, while Bluetooth models depend on a nearby phone. Wi-Fi models offer remote access but need stable network coverage and usually consume batteries faster. Fingerprint locks can be convenient, though cold or wet fingers may cause failed readings.

Lever-style smart locks suit doors without separate deadbolts, but they are not automatically compatible. Check whether the door uses a tubular latch, mortise lock, or multi-point mechanism. Glass panels, narrow frames, and unusually thick doors may require special hardware. I once assumed a familiar deadbolt would fit, but the backset was different by a few millimeters. That small error mattered. Test the key and thumb-turn before tightening every screw. The latch should move smoothly, without pressure against the strike plate. Fresh batteries help, but alignment matters more.

Tools and Measurements Needed Before Installation

Before installing a smart lock on a standard door, prepare the right tools and confirm every measurement. You will usually need a tape measure, Phillips screwdriver, pencil, flashlight, level, and fresh batteries. A small drill may help, but do not enlarge holes until the instructions confirm the required size. Keep the existing screws nearby for comparison. They may look suitable but have different lengths.

Measure the door thickness, backset, and borehole diameter. The backset is the distance from the door edge to the center of the lock opening. Common sizes vary, so measure rather than guess. Check the door edge and confirm the latch face sits flat against it. Also measure the distance from the floor to the lock, especially when replacing an older unit. The interior clearance matters too. Turn the handle and inspect nearby walls, trim, and glass panels.

Test the door before removing anything. It should close smoothly without force, and the latch should enter the strike plate cleanly. A smart lock cannot correct a sagging door. I once treated a slightly misaligned frame as a lock problem, which wasted time and caused unnecessary adjustments. That mistake is easy to repeat. Mark each measurement on paper, then compare it with the installation guide. Check the door swing and confirm the lock body will not touch the frame. Remove metal debris after drilling, and keep the door supported while working. Take your time. Small errors become loud clicking noises later.

2026 Top Smart Locks: How to Install a Smart Lock on a Standard Door?

Check these common residential door dimensions before installation. Measure the door and existing lock preparation to confirm compatibility with the smart lock instructions.

Tools commonly needed: tape measure, pencil, Phillips screwdriver, flathead screwdriver, drill, 54 mm hole saw, 25 mm spade bit, level, and a ruler.

Measurement guide: Typical door thickness is 35–45 mm, standard backsets are 60 or 70 mm, the main bore is approximately 54 mm, and the latch edge bore is commonly about 25 mm. Always verify the lock manufacturer’s compatibility requirements before drilling or modifying the door.

Removing the Existing Lock and Preparing the Door

Before installing a smart lock, remove the existing hardware carefully. Keep the screws in a small tray.

Open the door and extend the latch. Remove the interior screws, then pull both lock halves apart without forcing them. Take out the latch assembly from the door edge. If the deadbolt resists, check that its thumb-turn is fully vertical. Do not pry against the wood. According to the Builders Hardware Manufacturers Association, common residential deadbolts use 2 3/8-inch or 2 3/4-inch backsets. Measure yours before ordering or fitting the new lock. A few millimeters matter.

Inspect the bore hole, door edge, and strike plate. Remove paint flakes, dust, and loose splinters with a vacuum and fine sandpaper. The latch should slide freely and sit centered in the opening. Check the door thickness with a ruler, then compare it with the smart lock’s installation range. Grand View Research estimates that the global smart-lock market reached about $2.9 billion in 2023, reflecting fast adoption but not guaranteeing every door will fit. Standards still matter more than market growth.

Close the door gently and watch the latch enter the strike. It should not scrape. I have seen new locks fail because the old strike sat slightly low. That small error can strain the motor. Correct the alignment before installing electronics. Honestly, reusing an uneven strike saves minutes but may create problems later. A clean, square opening gives the lock a better chance to work quietly and reliably.

2026 Top Smart Locks: How to Install a Smart Lock on a Standard Door? – Removing the Existing Lock and Preparing the Door
Step Preparation Item Typical Dimension or Requirement Removal and Door-Preparation Guidance
1 Identify the lock type Single-cylinder deadbolt or tubular latch set Confirm whether the existing lock has a separate exterior key cylinder and interior thumb-turn. Most retrofit smart deadbolts are designed for standard deadbolt preparation rather than mortise locks or interconnected locksets.
2 Measure door thickness Common residential range: approximately 35–45 mm Measure the actual slab, excluding trim and weatherstripping. A thicker or unusually thin door may require an approved extension kit or a different lock model.
3 Measure backset Common standards: 60 mm or 70 mm Measure from the door edge to the center of the cross-bore. Adjustable latches often support both measurements, but this must be verified before installation.
4 Check cross-bore diameter Common residential diameter: approximately 54 mm Measure the large circular hole through the door. Do not enlarge the hole unless the installation instructions specifically permit it and the door structure will remain sound.
5 Check edge-bore diameter Common latch bore: approximately 25 mm The smaller hole in the door edge should align with the latch body. Remove loose debris and confirm that the latch face sits flush with the door edge.
6 Prepare tools Phillips screwdriver, tape measure, pencil, flashlight, and level A manual screwdriver is preferred for final tightening. If a drill is needed for minor adjustment, use low pressure to avoid damaging the door or stripping fasteners.
7 Secure the door Door fully open during removal and fitting Keep the door open so the latch cannot accidentally engage while the lock is disassembled. Place small screws in a container to prevent loss.
8 Remove interior hardware Usually 2 mounting screws Support the exterior part of the lock while loosening the interior screws. Remove the thumb-turn assembly and retain the screws until the old lock has been completely removed.
9 Remove the exterior cylinder Lift the exterior assembly out of the cross-bore Keep the connecting tailpiece aligned while pulling the cylinder away. Avoid forcing it if the tailpiece is caught in the latch mechanism.
10 Remove the latch Usually 2 screws on the door edge Unscrew the latch faceplate and slide the latch out through the edge of the door. Inspect the cavity for splinters, paint buildup, bent metal, or obstructions.
11 Inspect the door and frame Latch must move freely and align with the strike Check that the door closes without excessive force. A smart lock may fail to operate if the latch rubs against the strike plate or if the door is sagging.
12 Check strike-pocket depth Must accommodate the full latch or bolt throw The bolt should extend and retract without contacting the strike. Clean the pocket and adjust the strike plate only when necessary to achieve smooth mechanical movement.
13 Confirm door handing Left- or right-swinging door Some smart locks calibrate automatically, while others require a handedness setting. Determine the swing direction before attaching the interior motor assembly.
14 Clean and dry the mounting area Flat, stable, and free of loose material Remove dust and loose paint around the bore. Do not install over warped surfaces, cracked wood, or unstable trim without correcting the underlying problem first.
15 Final pre-installation check Correct dimensions, aligned holes, smooth latch travel Before installing the smart lock, verify the door thickness, backset, bore sizes, included mounting hardware, and compatibility with the existing strike plate.
Measurements are common residential standards and may vary by door, region, and lock design. Always compare the actual door dimensions with the installation requirements supplied with the selected smart lock.

Installing and Connecting the Smart Lock Step by Step

Before installation, check the door’s dimensions, latch type, and swing direction. A standard door is not always truly standard. Measure the backset, usually 60 or 70 millimeters, and confirm the deadbolt moves freely. Grand View Research estimates that the global smart lock market could grow at about 19% annually through 2030. That growth makes careful fitting more important, not less.

INSTALLATION Remove the interior thumb-turn, then keep the exterior cylinder aligned with the door hole. Attach the mounting plate without overtightening. The bolt should slide smoothly when the door is open. Insert the batteries only after checking the wiring. Small mistakes matter. I once tightened a plate too firmly, and the motor struggled during calibration. Leave slight mechanical freedom, but avoid visible movement.

Open the companion app and create an administrator profile using a strong, unique password. Enable Bluetooth during pairing, then follow the calibration prompts with the door open. Test locking, unlocking, keypad entry, and the interior thumb-turn. Connect Wi-Fi only after local pairing succeeds. Parks Associates’ smart-home research identifies connected security as a major adoption category, yet convenience should not replace physical checks. Test the lock again with the door closed. Check battery warnings and emergency access procedures. Installation guides often look simple; real doors can be uneven. Recheck alignment after several days.

Testing, Configuring, and Maintaining the Smart Lock

Testing, Configuring, and Maintaining the Smart Lock

After installation, test the smart lock with the door open. This prevents accidental lockouts. Check manual turning, keypad response, app control, and the physical key. The bolt should extend smoothly without scraping the strike plate. A 2-millimeter misalignment can increase motor strain and drain the battery faster. My first test was too optimistic. I tested only from inside and missed a stiff exterior turn.

Configuration should follow a simple security routine. Create individual user codes, remove temporary codes, and activate automatic locking only after measuring the closing time. Keep emergency access practical. Store recovery credentials offline, not inside the locked room. IoT Analytics estimated 17.1 billion connected IoT devices worldwide in 2024, increasing the importance of secure setup and regular updates. NIST guidance also recommends unique credentials and strong authentication for connected devices.

Maintenance is quiet but essential. Inspect the strike plate monthly, tighten loose screws, and clean the bolt with a dry cloth. Avoid oil unless the manufacturer specifically permits it. Check battery warnings immediately. Cold weather may reduce battery performance, so test the lock after temperature changes. The 2024 Verizon Data Breach Investigations Report found that the human element remained involved in most breaches, making shared codes a real weakness. I would not rely on every automatic feature. Recheck access logs, firmware status, and locking behavior every few months. A smart lock is convenient, but it still depends on a properly aligned door and careful human judgment.

FAQS

Which smart locks usually fit standard doors?

Replacement-style locks often fit doors with cylindrical deadbolts, round bores, and common backsets. They use the existing opening. Measure everything first.

What measurements should I take before ordering?

Measure door thickness, backset, bore diameter, and edge clearance. Also check interior space near walls, trim, and glass. A few millimeters can matter.

What is the backset?

The backset measures from the door edge to the lock opening’s center. Common sizes vary. Do not estimate it.

Are retrofit smart locks suitable for renters?

Often, yes. They attach over the inside thumb-turn and leave the outside keyhole unchanged. This usually requires fewer door alterations.

How do keypad, Bluetooth, and Wi-Fi locks differ?

Keypad locks use entry codes. Bluetooth models usually need a nearby phone. Wi-Fi models allow remote access but need reliable network coverage.

Can fingerprint locks work in every condition?

Not always. Cold or wet fingers may produce failed readings. Keep another entry method available.

Are lever-style smart locks automatically compatible?

No. Check whether the door has a tubular latch, mortise lock, or multi-point mechanism. Glass panels and narrow frames may need special hardware.

How can I prepare the door before installation?

Test the door before removing the old lock. It should close without force, and the latch should enter the strike cleanly. Keep screws in a small tray.

What should I do if the new lock makes loud clicking sounds?

Check alignment before blaming the electronics. The latch may scrape the strike plate or press against the frame. Fresh batteries help, but alignment matters more.

Should I enlarge the existing borehole?

Not immediately. Confirm the required opening size in the installation guide first. I once assumed a familiar lock would fit, but the backset was different. Small errors become expensive distractions.

Conclusion

This guide explains how to install a smart lock on a standard door, beginning with the main lock types and their compatibility requirements. It shows readers how to check door thickness, backset, existing hardware, and cylinder design before choosing a suitable model. It also covers the essential tools and measurements needed for a smooth installation, helping prevent alignment problems and unnecessary drilling. Before fitting the new lock, the guide explains how to remove the existing hardware safely and prepare the door, frame, and mounting holes.

The step-by-step installation section describes how to attach the interior and exterior components, connect the power source, and pair the lock with its control system. After installation, readers learn how to test locking and unlocking functions, configure access methods, adjust automatic locking settings, and confirm that the door closes securely. The guide concludes with practical maintenance advice, including battery checks, cleaning, firmware updates, and periodic inspection of screws and alignment to ensure reliable long-term performance.

Amelia

Amelia

Amelia is a seasoned marketing professional with a wealth of expertise in our company’s core offerings. With an unwavering passion for driving growth and innovation, she plays a pivotal role in shaping our marketing strategies and enhancing brand visibility. A key aspect of her responsibilities......